Magento 2 provides a powerful Page Builder feature that allows you to customize your website pages without any coding knowledge. Here are the steps to customize the Page Builder in Magento 2:
- Log in to your Magento 2 admin panel.
- Go to the Content tab and click on Pages.
- Click on the Edit button of the page you want to customize.
- Click on the Edit Page button to start customizing the page with Page Builder.
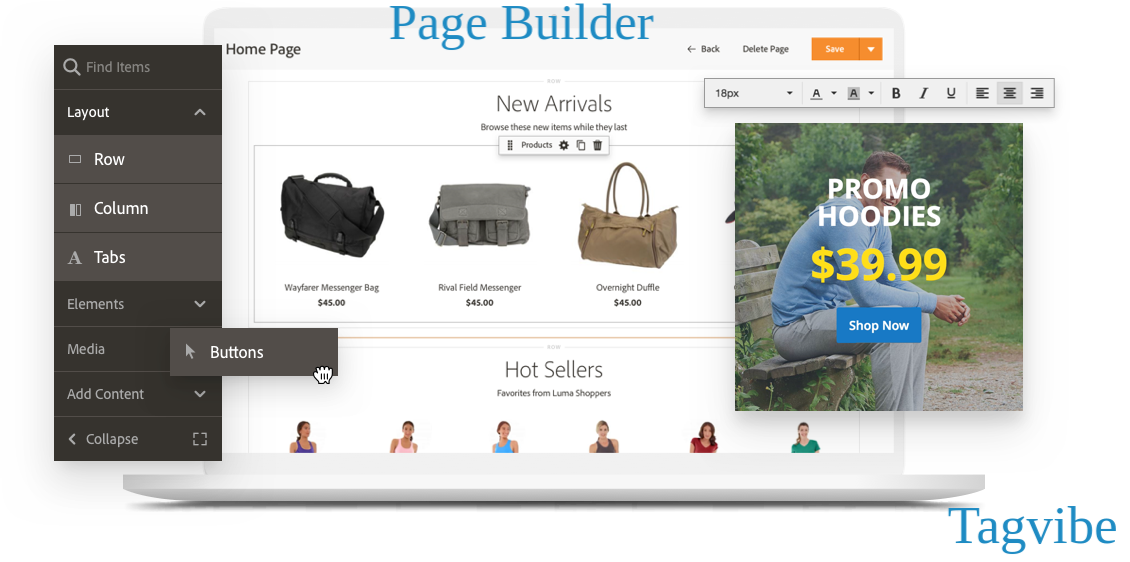
- To add new elements to the page, click on the Add Content button.
- Select the element you want to add and drag it to the desired location on the page.
- To configure the settings of each element, click on the element and choose the Edit option.
- You can customize the element’s properties, such as background color, font size, and more, using the options available in the panel.
- Once you are done with the changes, click on the Save button to save the changes.
Here are some more tips on how to customize the Page Builder in Magento 2:
- Create a custom block: You can create custom blocks with custom content and use them on different pages. To create a custom block, go to the Content tab and click on Blocks. Then click on the Add New Block button and enter the block information. After that, add the block to your page using the Page Builder.
- Use the Page Builder’s advanced options: The Page Builder has many advanced options that allow you to customize your pages even further. For example, you can add animations, create custom page layouts, and set up responsive designs for mobile devices.
- Customize the page layout: With the Page Builder, you can customize the page layout by adding columns and rows. To add a new column, click on the Add Column button in the Page Builder panel. Then, drag the elements to the column to create your desired layout.
- Preview your changes: Before publishing your changes, you can preview them to ensure that everything looks the way you want it to. Click on the Preview button in the Page Builder panel to preview your changes.
- Use templates: Magento 2 offers pre-designed templates that you can use to create your pages. To use a template, click on the Templates button in the Page Builder panel, choose a template, and then customize it to your liking.
- Use widgets: Magento 2 offers a range of widgets that you can use on your pages, such as images, videos, and social media links. To add a widget, click on the Add Content button and select the Widget option. Choose the widget you want to add and customize its settings.
Here is an example of how you can customize the Page Builder in Magento 2:
Let’s say you want to create a custom homepage for your online store. You want to include a banner, a featured products section, and a newsletter signup form. Here are the steps to achieve this using the Page Builder:
- Log in to your Magento 2 admin panel and go to the Content tab.
- Click on Pages and select the Homepage to edit.
- Click on the Edit button to edit the page with Page Builder.
- Click on the Add Content button and select the Banner option.
- Drag and drop the banner element onto the page and customize it by adding your desired image and text.
- Add a new row to the page by clicking on the Add Row button in the Page Builder panel.
- In the new row, add three columns by clicking on the Add Column button and selecting the 1/3 layout option.
- In the first column, add a Featured Products element by clicking on the Add Content button and selecting the Featured Products option.
- Customize the Featured Products element by selecting the products you want to feature and choosing their display options.
- In the second column, add a Newsletter Signup element by clicking on the Add Content button and selecting the Newsletter Signup option.
- Customize the Newsletter Signup element by adding your desired text and selecting the form fields you want to include.
- In the third column, add a Custom HTML element by clicking on the Add Content button and selecting the Custom HTML option.
- Customize the Custom HTML element by adding your desired HTML code for additional content or design.
- Preview the page to ensure everything looks the way you want it to.
- Once you are satisfied with the changes, click on the Save button to save the changes.